Popcorn Ceilings Look Old. Popcorn ceilings were trendy in the 1960s through the 1980s. This ceiling gives homes and businesses an outdated look that is keeping with today’s interior design. No matter how much else is updated in a room, a popcorn ceiling will give it an old look and strong associations with the era. Ceilings today have smoother, cleaner textures. Popcorn Ceilings can be challenging to paint, repair and maintain. The popcorn ceiling’s extreme texture makes it difficult to paint, repair, and support. It is nearly impossible to paint evenly due to the recesses and crevices in the ceiling. This requires delicate touches and multiple coats with drying time between them. Removing dirt and dust from the ceiling can be frustrating and exhausting. Special sprays and tools are required to repair popcorn ceilings. Popcorn Ceilings Could Cover Up an Issue In the past, contractors and homeowners did not use popcorn ceilings to conceal or cover up an issue, impropriety, or problem. Popcorn Ceilings May Have Asbestos. Many popcorn ceilings that were installed before 1978 contain asbestos. It can be challenging to determine if your ceiling has asbestos. Royal Palm Beach Popcorn Ceiling Removal & Drywall Services can provide you with asbestos testing information over the phone. Popcorn texture was used to replace cracked repair at a lower price. It was also used to reduce the cost of drywall finishing. Regardless of the reason, removing it is only the first step. After the popcorn has been removed, there will likely be damaged corners or joints. For a uniform appearance, seal all surfaces. The final step is painting. Residential Popcorn ceiling removal is often part of a larger indoor painting project. Sometimes DIY removal is an option. This is a messy and low-glamor project. Some people tried to speed up the process by painting the popcorn to refresh it. Bad Idea – Latex paint can cause popcorn to become softer and may even peel off. Once the popcorn ceiling material has passed inspection by a lab certified, it is time to consider removal. The cost of popcorn removal for flat ceilings is generally $5 per square foot. A two-story vaulted ceiling will be more expensive, and a 10’x10′ bedroom will require more work. Asbestos, a well-known carcinogen, may be present in spray-on ceiling finishes. It is essential to test your ceiling for asbestos before you proceed. Use a dual-cartridge respirator to remove small amounts of popcorn from the ceiling. Drop off the sample at the local EPA office. You should hire an asbestos removal company to remove asbestos from popcorn ceilings. This is not something you can do by yourself. If there is no evidence of asbestos in the laboratory results, it’s safe to go to work. It can be messy to remove popcorn from a ceiling. To avoid this, empty the room of any furniture, rugs, or lamps. Turn off the electricity and shut off the cooling and heating systems. The canopy, the upturned bowl-shaped fixture attached to the ceiling, should be lowered. Cover the ceiling-mounted ceiling lights and ceiling fans with a plastic bag. Cover the floor with plastic drop cloths or canvas, then drape the walls with lightweight plastic sheeting. To remove popcorn texture from drywall, spray it with water. This will soften the popcorn. It won’t absorb water if the popcorn is painted, so removing it will be more challenging. Spray a small area with water to check if the ceiling has been painted. If it does not, you will need to dry-scrape the popcorn, which is a more complex and messy job, or apply a chemical paint removal agent. Let’s say your popcorn ceiling has not been painted. The next step is to fill a 3-gallon pump-up gardening sprayer with hot water. Next, add one-half cup of liquid fabric softener. This will stop the water from evaporating too quickly. Spray the ceiling using the pump-up sprayer. Let it sit for about ten more minutes before respraying it. Allow it to soak for ten minutes, then use a ten-inch-wide drywall knife and scrape off the popcorn texture. A specially designed popcorn ceiling scraper with a 12-inch blade and a metal frame can be used. Attach the scraper to any standard push-broom handle or extension pole, and then attach a small plastic bag to the edge. The bag will catch the popcorn as you scratch the ceiling. This makes cleanup much more accessible. Avoid damaging the ceiling by holding the popcorn scraper or drywall knife at a shallow angle. Using a bench grinder, you can reduce the chance of cutting into the drywall. After cleaning the ceiling, sweep the popcorn off the floor and leave the tarps. No matter how careful you work, there will be minor scratches or gouges on the ceiling. A joint compound can fill in any cracks after dry repairs, sand lightly, and apply one coat of primer, followed by two topcoats of ceiling paint. You can then remove the tarps and admire your work. The remaining material can be sanded down. The scraper might not remove all of the material in one go. Sandpaper can remove any leftover popcorn material that the putty knives left behind. Now is the perfect time to paint your ceiling. Before priming or painting the ceiling, ensure you have removed all dust and debris from the scraping. A popcorn ceiling is not the right choice for your home. It doesn’t reflect your taste and style. Although removing popcorn ceilings can be difficult, it is worth the effort. You will enjoy a more modern space and more enjoyment in your daily life. While scraping the popcorn ceiling is the best method to remove any contamination and make your home as clean as possible, it doesn’t have to be the only option. To cover the popcorn ceiling, you can use any of the alternatives we have just mentioned. Popcorn ceilings have seen more time in the spotlight than they deserve. It doesn’t need to be difficult if you want to make some improvements to your home or sell your house. It is essential to stay safe and determine if your popcorn ceilings contain asbestos before you begin any work. You can remove the popcorn ceiling in a matter of hours with essential preparation and inexpensive materials. The surface will be clean and ready for any treatment. Popcorn ceilings, also known as stipple and acoustic, were a popular finish applied to residential ceilings before 2000. However, with the advent of the new millennium, the trend shifted towards a cleaner and modern look. This relic is still found in many older homes due to the tedious and messy removal process. However, someone must do it. We spoke to two professionals in home remodeling to learn more about removing your popcorn ceiling. You won’t need many tools to remove this finish from your ceiling. Royal Palm Beach Popcorn Ceiling Removal & Drywall Services recommend using a scraper, a ladder, scaffolding, and a water-filled spray bottle to get the best results. After the removal, the hard part is managing the debris you’ve removed. They explain that the problem with this method is the mess it makes. They recommend covering all the areas you are working in with plastic sheeting. This will catch as much “popcorn” as possible. She also suggests that you shut off your furnace or air conditioner system to stop the “popcorn” from spreading around your home. Royal Palm Beach Popcorn Ceiling Removal & Drywall Services suggest spraying a 2-foot by 2-foot section with water. Let it sit for a while before you start scraping. Spray the next area before you start scraping. This will make the process faster. Protective goggles and a mask are essential. Old clothes can be tossed out right away. After you have finished scraping, you can sand and texture (it’s perfectly acceptable to texture ceiling–it just hides imperfections), prime, or paint. Before you sand, any damage can be quickly repaired using drywall tape or joint compound. Another step is to test for asbestos before starting the removal process. This is especially important if you live in a home built before 1980. You can order an online home testing kit to confirm that there is no asbestos. You’ll also want to open your windows to allow proper ventilation. Even without asbestos, there are many harmful materials and small particles you should avoid inhaling while working. After the ceiling has been completed, remove any texture residue and sand it smooth. The primer coat can then be applied to paint or create a new wall texture. After the ceiling texture has been removed, you can apply a subtle texture using the Homax aerosol orange peel & knockdown Ceiling Texture. This helps hide surface imperfections that might be more obvious if the ceiling has been painted flat. Do not attempt to remove a ceiling texture that was installed before 1979. Inhaling asbestos fibers can lead to serious health problems, including cancer. Before the 1980’s asbestos was used in thousands more construction materials and manufactured goods, including popcorn ceiling textures. Contact the Environmental Protection Agency or have it tested professionally by a testing company for more information. We offer the above services at the following locations within Royal Palm Beach:
If you are located in Palm Beach County and you don’t see your city/area listed above, don’t worry! We cover all of Palm Beach County. Fill out the contact form above or CLICK HERE and send us a message. We’ll get back to you asap!
Residential Popcorn Ceiling Removal
Contact Us

Popcorn removal cost
Asbestos Testing

Prepare the Room
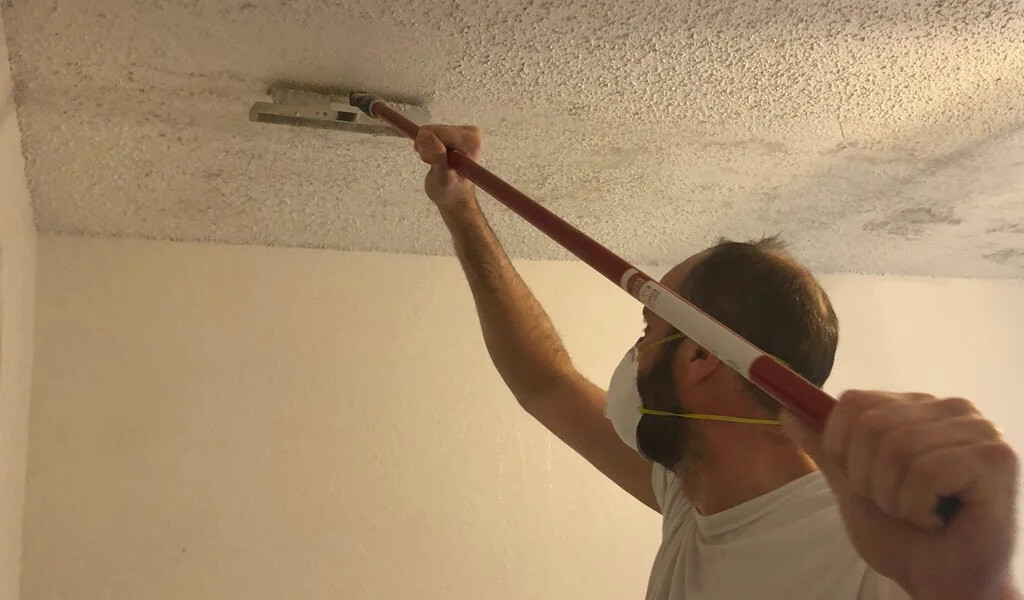
Get ready to scrape
Soak, then scrape
Final touches
Prime and paint
Ready to Remove
Step by Step
Protect yourself
Locations We Serve