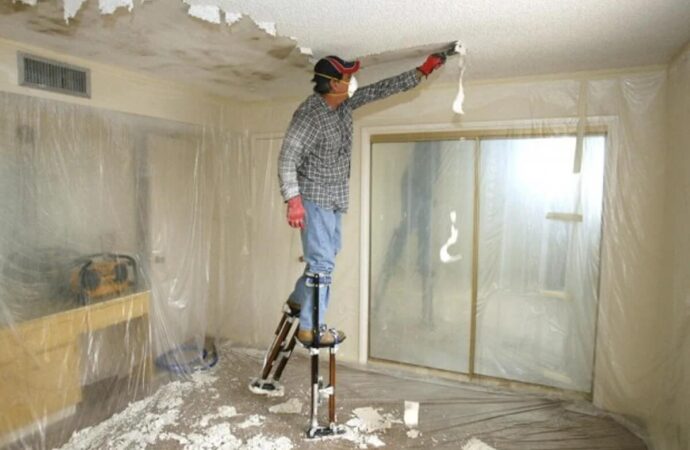
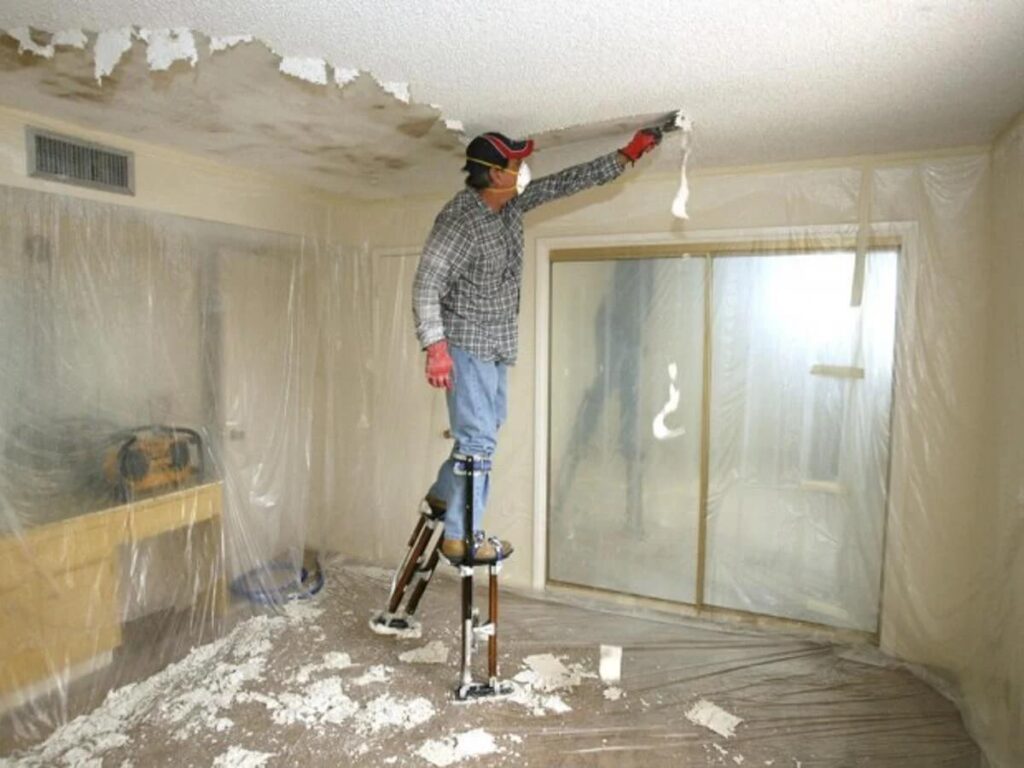
Popcorn texture gained popularity in the 1930s when it was first introduced. This style is most likely familiar to anyone who has lived in homes built between 1970 and 1990. This texture is so good at absorbing noise that it was sometimes called an “acoustic texture.” Popcorn ceilings are also called acoustic or cottage cheese ceilings. They are rough-textured with Styrofoam or stucco materials. These materials give them the look of popcorn. Because it was less costly than properly painting, this type of ceiling was trendy in 20th-century home construction. Popcorn ceilings conceal imperfections like cracks or holes and are cost-effective for DIYers and painters. The ceiling was created by simply spraying the mixture with a hopper gun or using a sponge to apply it. Popcorn ceilings are difficult to maintain and clean. Over time, cracks and holes develop. Dust, dirt, spider webs, and dust stick to the popcorn ceiling’s craggy surface. Smoke can quickly stain it. You can tear off small pieces of popcorn to clean it. This creates an uneven appearance that only gets worse over time. This texture was popular due to its simplicity, affordability, and quick application. This texture is easily identified by the “popcorn”-like peaks in the drywall cement. Popcorn texture is simple, but it can be hard to get out. This is why textured walls often get a bad reputation. It would help if you remembered this when deciding on popcorn wall texture. This texture requires little preparation, but you must clean and prime the surface. Mix the dry mixture with water to make popcorn. It is mixed with water and then applied to the surface using a hopper gun powered by an air compressor. This gives the most coverage to the surface. To achieve the classic popcorn texture, you will need to apply more than one coat. These should be involved in thin layers. However, thicker popcorn coatings will not give the desired effect. Each layer should dry for at least 24 hours after it is applied. Popcorn texture mixtures are approximately $.19 per square foot to install. Royal Palm Beach Popcorn Ceiling Removal & Drywall Services believes that popcorn ceilings have served their purpose. There are better ceiling options. Our technicians have been perfecting their professional popcorn ceiling removal methods for over 20 years. We aim to deliver efficient and effective popcorn ceiling removal that will revitalize your home and cause minimal disruptions to your daily life. How can we do this? By using our proven multi-step process: We spray the ceiling with a water-based solution that quickly removes unpainted stucco. The popcorn ceiling is then eradicated. We will then prep the area to preserve the substrate if the plaster has been painted. Our popcorn ceiling technicians will fill the substrate with a flat finish after it is removed. We clean up and vacuum all your belongings. Our comprehensive restoration services leave your space in its best possible condition. Why not hire a professional popcorn ceiling Removal Company from Patches in a Day. Our expert work has many benefits: The modern look of your interior is more elegant and contemporary than ever. Now you can create the look you desire without worrying about trapped dust and smoke stains. A popcorn ceiling can increase the resale price of your home. Potential buyers won't buy houses that need renovations or ceiling removal immediately. Popcorn ceilings start to turn yellow as they age. After years of rain and storms, they can sustain water damage. It is better to replace them than to paint over popcorn ceilings. Popcorn ceilings can look old and may be difficult to paint or repair. This guide will show you how to remove popcorn ceilings using the right tools effectively. The popcorn-ceiling texture can improve the home’s value, reduce light discoloration, and make future renovations more straightforward. Although the process is time-consuming, it is possible to do it yourself. To determine if the ceiling has been painted, first test the area. Regular texture spray is easier to remove than painted texture. You will need to use a paint remover if the texture is painted. Follow the instructions on how to use the paint stripper. You should ensure that the area is well ventilated. Are you fed up with looking at your old popcorn ceiling? Are you tired of looking at your old popcorn ceiling? It is also safer because it doesn’t collect dust, which can be a problem if you have allergies. A flat ceiling is more straightforward to repair than a textured one if it has been damaged. It is more challenging to repair a popcorn ceiling or a textured ceiling. You will need to improve the drywall and spray the popcorn texture on the drywall, and feather it. These are just a few reasons to remove your popcorn ceiling. You can have a smooth ceiling. A popcorn ceiling can be damaged by water. The popcorn can become brittle and fall off the ceiling, creating a mess. It is better to remove the entire ceiling if there has been any water damage. Even if you have not suffered any water damage, furniture scrapes or other dents can build up over time. This can cause your ceiling to look worn. You can start over by removing the popcorn texture. This will make it much easier to fix later if needed. Water damage is caused by water leaking from either loosening your ceiling or leaving a large stain. Moving furniture, or anything that touches the ceiling, is called furniture scraping. People repair popcorn ceilings because of water damage. The Mississauga handyman receives many calls about ceiling damage due to water. Sometimes, water damage is superficial. Sometimes the paint may start to peel off, or the texture may begin to sag. You can repair the damage yourself by patching it and then painting over the entire area. You might be willing to make a minor repair to your popcorn ceiling to save money. If the damage is severe, you should hire a professional to take down the entire ceiling and replace it with a smooth one. Now that you know why popcorn ceiling removal is essential let’s see how to do it yourself. Grab a ladder and place some plastic sheeting to catch any debris falling. You should cover any flooring or furniture that the plastic sheeting may damage. To protect your flooring and furniture from dust and debris created by the stucco ceilings removal process, you will need to cover them with plastic sheeting. Next, spray the ceiling with water using a power washer or hose. This will loosen the popcorn material. Next, use a scraper or putty knife to remove as much popcorn texture as possible. While removing the texture, it is essential not to damage the walls. After the popcorn is removed, you can begin creating. Because a smooth surface is essential, you can start to make it. This is crucial for ceiling preparation. Now it’s time to smoothen the ceiling’s surface. This step can be done with a fine-grit sandpaper. Dust will fly everywhere, so wear goggles and a dust mask while you sand. You can use the scraper or putty knives to remove any texture that is not entirely gone. The next step is to apply a thin coat of joint compound (also known as skim coating or plastering) to smoothen the surface. This will create a smooth surface that can be painted. You can use a roller or brush to apply the joint compound. Follow the manufacturer’s instructions on how to mix the compound and apply it. After the skim coating has dried, you can paint the ceiling with latex paint. Ceilings can be painted with latex paints, which have a flat finish that will not show brush marks or roller marks. Once the surface has been smoothed, you can apply primer to make the paint stick better to the ceiling. After you have applied the primer, identify any flaws in the ceiling. This is the time to use a flashlight from an angle to cast shadows of imperfections like cracks, pinholes, or dips. Once the primer is dry, you can apply another coat of paint. Once the primer has dried, you can apply a second coat of paint to your surface. You can use a roller or a brush to apply the paint. Make sure you choose ceiling paint that has a mat finish. After the paint has dried, your ceiling will look brand new and instantly transform your space. Put your ceiling fixtures back on. After you paint, it is time to put the ceiling light fixtures back in place. You will need to replace any vent covers or fans that you have. You are now done with popcorn ceiling removal. Once the popcorn ceiling is removed, the surface can be smoothed, and you can enjoy your new ceiling. After the paint has dried, you can install new ceiling fixtures or replace existing ones. You now have a beautiful, smooth ceiling that will complete your room. So if you are interested in making a smooth ceiling by doing popcorn ceiling removal, you can look us up at Royal Palm Beach Popcorn Ceiling Removal & Drywall Services. If you found this article helpful, please share it with your friends so they can learn how to remove their popcorn ceilings too! Thank you for reading! We offer the above services at the following locations within Royal Palm Beach:
If you are located in Palm Beach County and you don’t see your city/area listed above, don’t worry! We cover all of Palm Beach County. Fill out the contact form above or CLICK HERE and send us a message. We’ll get back to you asap!
Popcorn Ceiling Removal
Contact Us

What is a popcorn ceiling?
The downsides
Professional Popcorn Ceiling Removal You Can Count On
Ceiling Removal
Flat Finish
Clean-up
The Benefits
Modern and sleek interior design
Resell Value
Increased savings

Smooth ceiling
Water Damage
Get Ready for Smooth Ceilings
Plastering or Skim Coating
Fix any ceiling problems
Locations We Serve

